01 Free macOS app

Crop the dead margin off any image.
The transparent border around an exported logo. The sea of white around a chart. The backdrop behind a product shot. Drop it on Trim and the margin is gone — one window, one slider, live preview. In the spirit of QuickCrop, but free.
Requirements
macOS 14+ · Apple Silicon & Intel · Version 0.2
Build from source
First launch
Trim is ad-hoc signed rather than notarized, so macOS may flag it. In Applications, right-click Trim → Open → Open. You only do this once.
02 The window
One window, and it fits on a postcard.
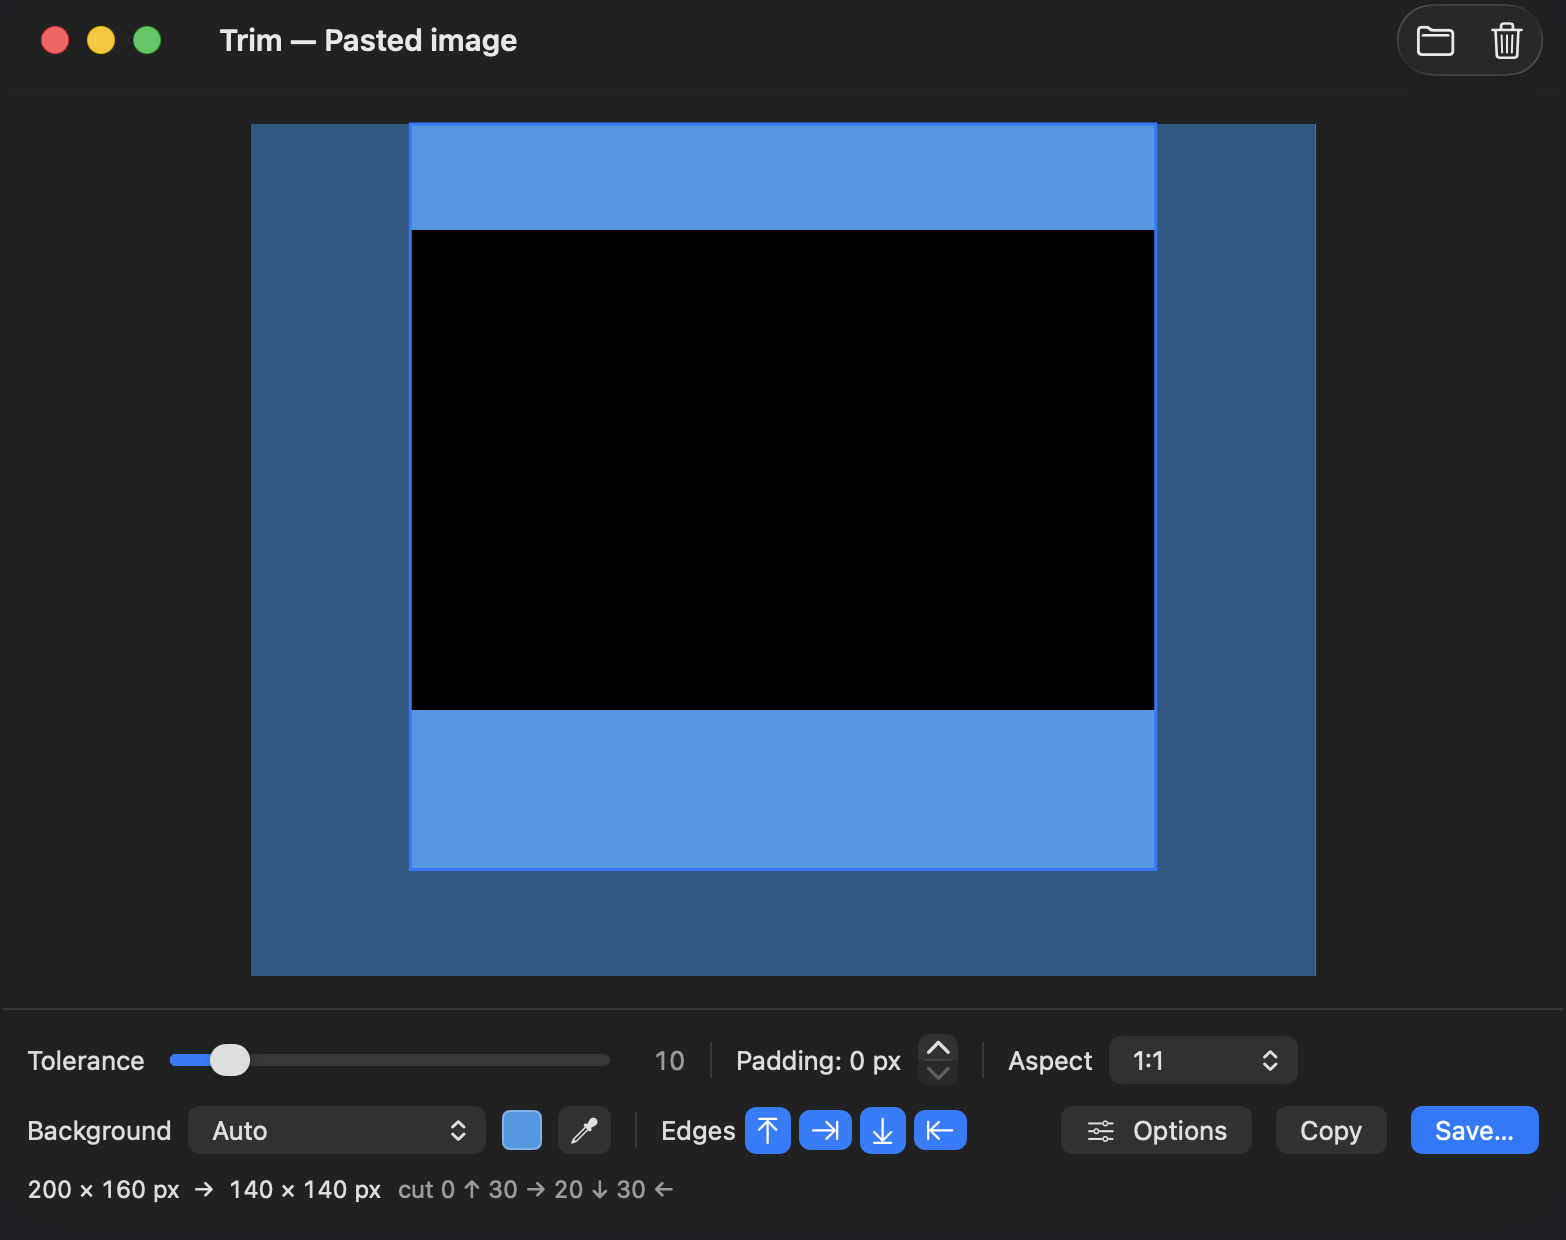
Image on the left, controls on the right. Dimmed margins show what's leaving; the numbers underneath say exactly how much.
03 Detection
It guesses right before you touch anything.
Most images need nothing from you. Trim reads the file, decides what the background is, and draws the crop.
One pass over the pixels
Drop an image and Trim reads the bitmap end to end, looking for the tightest box that still holds every bit of real content.
Any background color
It samples the four corners. If they agree — brand blue, paper cream, plain transparent — that's the margin, and everything else is artwork.
Honest about nothing to do
An image with no margin worth cutting says “already tight” rather than shaving a pixel off to look busy.
Live, off the main thread
Every change to the tolerance, the edges, or the ratio recomputes the crop as you drag. The window never stalls.
04 Controls
And when it doesn't, you decide.
Every control is one move away — no inspectors, no modes, no nested panels.
Background
White, black, transparency only, or a specific color eyedropped off the image with ⌘P and a click
Tolerance
One slider, 0–100, widening or tightening what counts as background
Edge locks
Lock the top, right, bottom, or left and that side stays exactly where it was
Aspect ratio
1:1, 4:3, 3:2, 16:9, or the original — the crop grows around its center until it fits
Padding
A stepper that keeps N px of breathing room around the artwork
Preview
Dimmed margins, a crisp crop outline, before → after dimensions, pixels off each side
Export
PNG, JPEG with a quality slider, or TIFF — at 25%, 50%, 100%, or 200% scale
Batch
Drop a pile of images, step through with ⌘↓/⌘↑, then Trim All… to a folder
05 In & out
Hands stay on the keyboard.
JPEG output is flattened onto white, so a transparent margin never comes back as a black one.
- ⌘O
- Open images
- ⌘V
- Paste from the clipboard
- ⌘P
- Eyedrop the background color
- ⌘S
- Save the trimmed image
- ⌘C
- Copy the trimmed image
- ⌘↓ / ⌘↑
- Step through a batch
Nothing leaves the Mac
No permissions to grant, no network calls, no analytics. Trim reads the files you hand it and writes where you tell it — and remembers your settings between launches.
06 Install
Up and running in a minute.
-
01
Download & open
Grab the disk image and drag Trim into your Applications folder. First time only: right-click Trim → Open to clear macOS’s unidentified-developer check.
-
02
Drop an image
Or ⌘O to open one, or ⌘V to paste from the clipboard. Trim finds the background and shows you the crop immediately.
-
03
Take it away
⌘S to save, ⌘C to copy, or drag the preview straight out into Finder. Your settings are waiting next launch.
Free & open source · Source on GitHub
07 Next step
Need something built with this much care?
Trim is what we do for ourselves. Tell us what you're making and we'll reply within 1–2 business days.